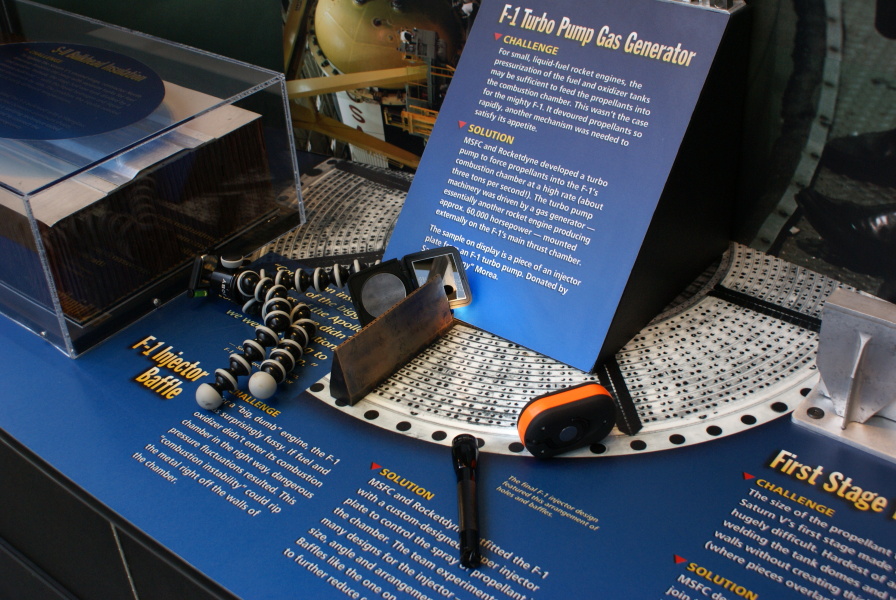
Injector Baffle Photo Setup
Some time after first photographing the F-1 rocket engine injector baffle at the U.S. Space & Rocket Center, I did an info page on the baffle, with diagrams showing its inner structure.
Prior to my next visit, I purchased a small pocket mirror so that I could more thoroughly inspect the baffle. When I did visit, I was excited to see that there was not just the expected one fuel flow hole, but two; this meant that the end of the baffle had been cut off, but it allowed a better look into the baffle's interior structure:

Click image for more information about this picture; opens in a new window.
Picture by heroicrelics.org.
However, the display was constructed to secure the baffle to the exhibit, not to allow ready photography of the back of the baffle. Some setup was required.
There was plenty of room for the mirror, but how to hold the mirror in place for the required long-exposure shot? The answer turned out to be my Joby gorillapod: its legs could be bent to just the right angle to support the mirror.
As one might expect, the back of the exhibit was rather dark, so supplemental lighting was necessary. I'd recently purchased a small LED worklight (which is the orange object on the right-hand side of the photo), which provided overall illumination. I maneuvered my trusty mini Maglite to highlight the holes.
So, the entire scene (of course, my camera was there in the middle when I took the photo!) looked something like