
Apollo 4 Hatch
Apollo 4 flew on November 9, 1967, some nine months after the Apollo 1 fire. The Apollo 1 fire exposed the need for several design changes to the command module, not the least of which was the need for a hatch which could be opened more quickly and which could be opened even if the CM interior was pressurized to a higher degree than ambient.
The Apollo 1 command module was a Block I CM, whose side crew hatch was a two-piece affair. The inner hatch was an inward-opening, completely removable hatch which had interlocking edge members on three sides and latches on the fourth. Cabin pressure helped seal the hatch to the command module structure and interior pressure had to be vented before the hatch could be removed and stowed. The outer, or ablative heat shield, hatch opened outward, was also completely removable, and was held in place by latches on all four sides. The Block I spacecraft had no requirement to support EVAs and the 90-second egress time afforded by the hatch was thought to suffice.
Although a modified hatch was already being created for the Block II Apollo spacecraft, it was very similar to the Block I hatch: It still had a two-piece design and the inner hatch was still held in place by the internal pressure of the CM. The primary difference from the Block I hatch was that the outer hatch was hinged so that it would not float off when opened during an EVA.
The fire changed the entire line of thinking about the command module hatch: It would have to open quickly (ideally in two to three seconds) and have the capability to be opened even if the pressure inside the cabin was higher than the pressure outside.
The unified Block II hatch was the result of this redesign. It was a single-piece hatch which opened outward on hinges. Because of the hatch's thickness and in order to support the hinge, there was a gap between the hatch periphery and the hatch frame in the command module's heat shield. A rubber thermal seal was used to prevent thermal flow in this gap.
The new hatch wasn't yet ready for flight when Apollo 4 flew, so it flew with a nearly-standard Block I hatch. The hatch was, however, modified so that a test panel with a simulated Block II thermal gap and seal was mounted in place of the glass window on the outer, ablative hatch. One objective of the mission was to thermally qualify the new unified hatch that would fly on Block II spacecraft (as it turned out, the new hatch would first be flown on Apollo 6 on an initial, unmanned test).
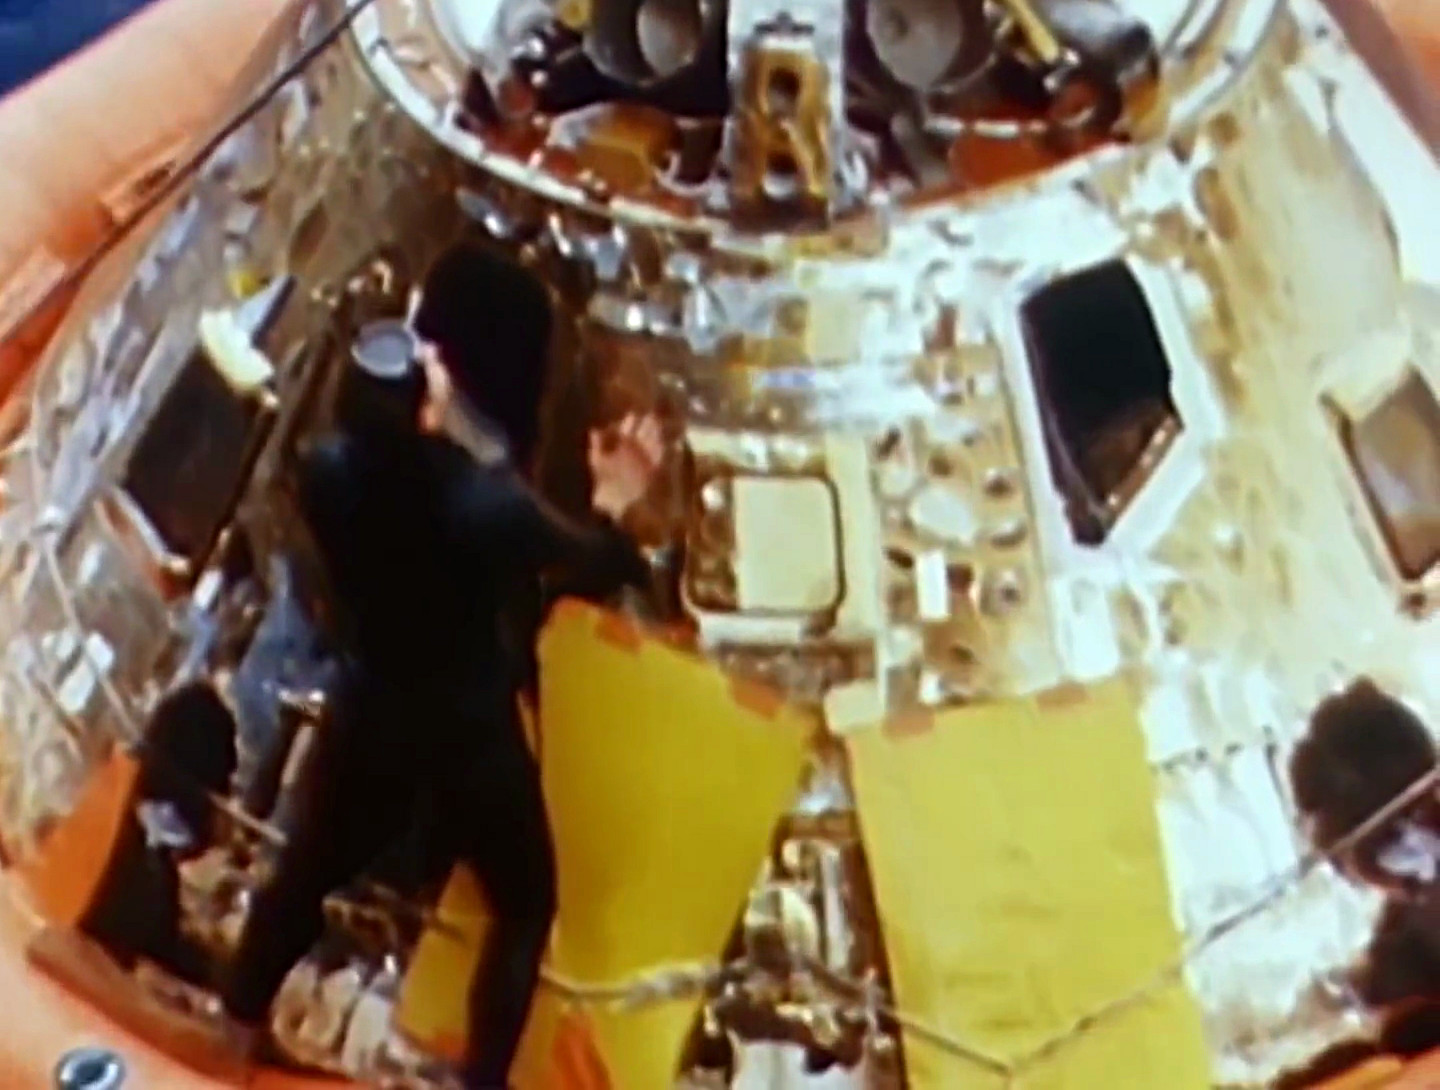
Here we see the hatch test panel as divers secure the spacecraft during recovery efforts:
Click image for a 1440x1090 pixel version of this image in a new window.
From the NASA film, The Apollo 4
Mission on YouTube.
Extraction and cleanup by heroicrelics.
A side view is available in this photo of the spacecraft aboard the U.S.S. Bennington:
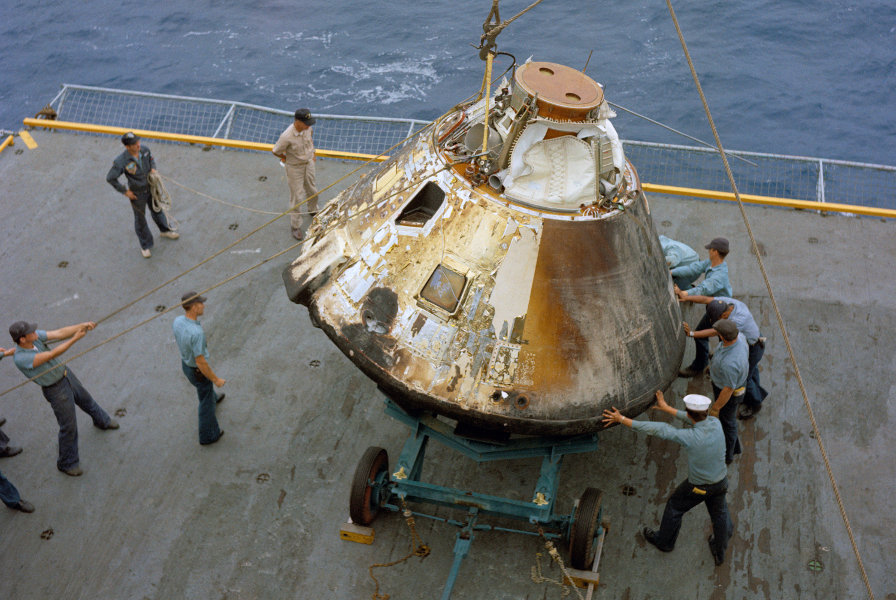
NASA photo AS4-19671109_S67-49442.
Scan courtesy Retro Space Images/J.L. Pickering.
A full-sized crop of the above photo:
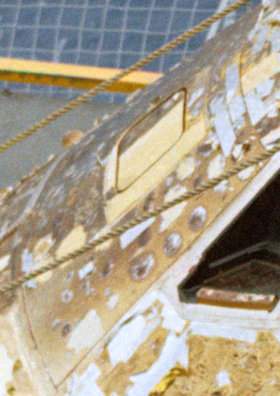
Full-sized crop of NASA photo AS4-19671109_S67-49442.
Scan courtesy Retro Space Images/J.L. Pickering.
A postflight examination of the seal showed that it was in essentially preflight condition. The maximum recorded temperature in the gap was 144°F.
Here's a close-up photo of the test panel, gap, and seal during a postflight examination:
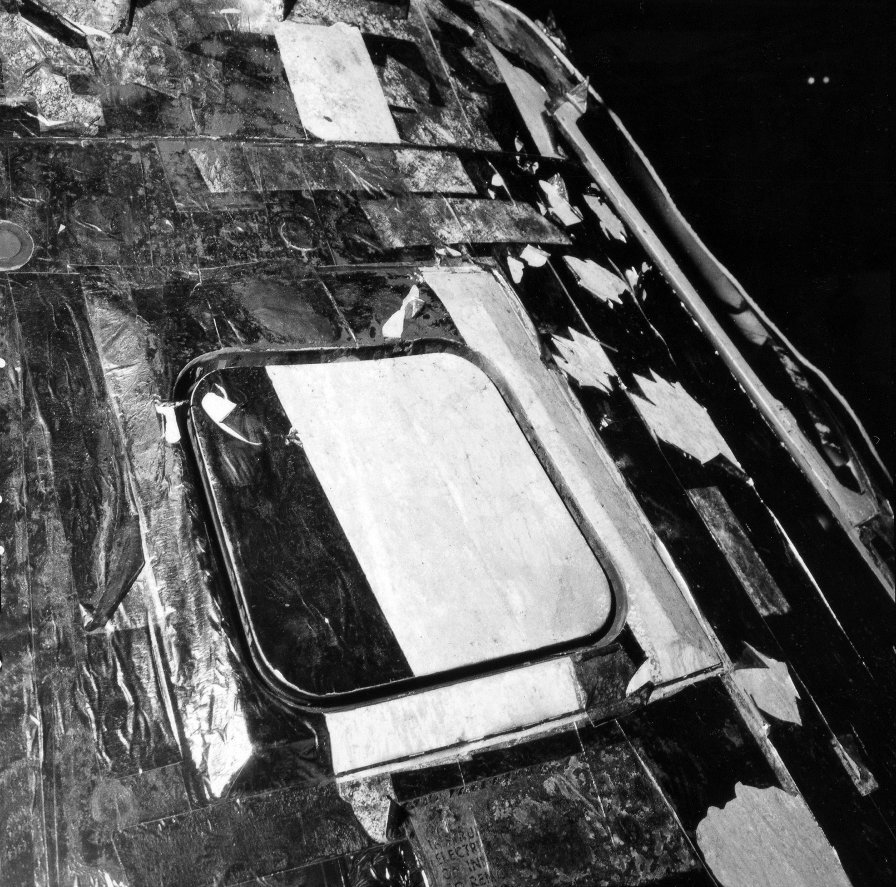
NASA photo AS4-S67-49451.
Scan courtesy Retro Space Images/J.L. Pickering.
For comparison, here is a postflight photo of the hatch from CM-009, which flew on AS-201, the first Saturn IB mission:
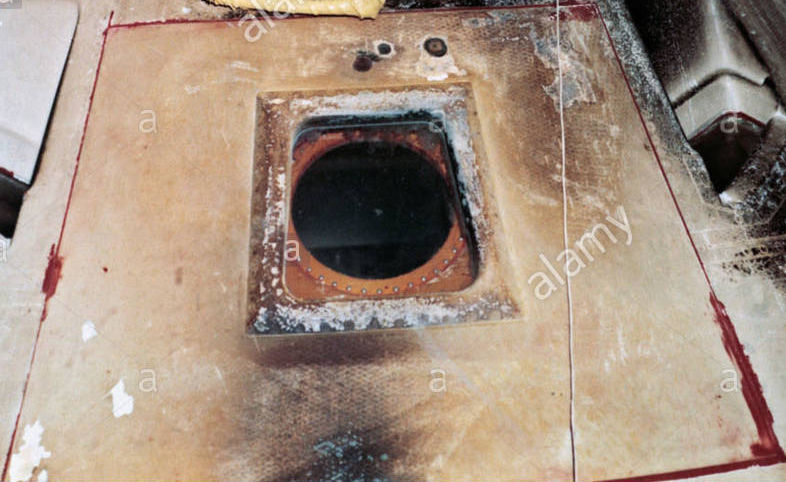
Full-sized crop of Alamy AS-201 photo.
The logic of having a trapezoidal window on the outer hatch but a round window in the inner hatch was not explained in any documentation I read :-)
Today, the Apollo 4 hatches are in the Smithsonian's collection, although they are not currently on display.
The Smithsonian has a photo of the outer hatch, although no collections database page; this is the inside of the heat shield hatch. If you look closely through the round window, you can see wires which are presumably from temperature instrumentation:

Click image to visit the Smithsonian "Apollo 4 Outer Hatch"
page.
Copyright/Owner: Smithsonian Institution. Content used on personal website per
Smithsonian Terms of Use.
The Air and Space Museum has a full collections database page regarding the inner, pressure hatch, shown below.
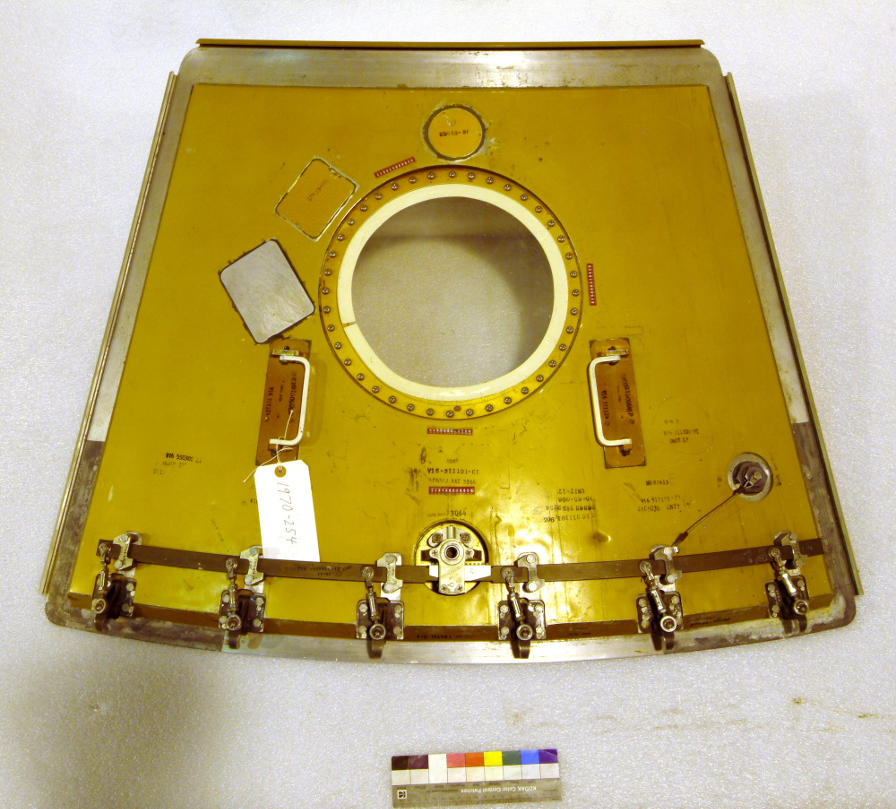
Click image to visit the Smithsonian "Hatch, Block I, Apollo 4"
page.
Copyright/Owner: Smithsonian Institution. Content used on personal website per
Smithsonian Terms of Use.
This photo is of the exterior of the hatch. Note the row of latches along the bottom edge of the hatch, which would engage with keepers on the hatch sill. A tool would be inserted in the round hole in the circular fitting at the center of the latches by ground crews to open and close the hatch; a similar mechanism on the inside of the hatch would have allowed the crew to open the hatch.